⚒️ Minting an Asset per User
Learn how to mint a unique asset for your users with the Owl API.
We will see how to effortlessly mint of assets for your users with Owl Protocol.
This process is especially beneficial for airdrops, giveaways, or any campaign that aims to provide your users with a unique asset.
To mint an asset to your user, you need a Project API key, which can be retrieved from our dashboard.
For more information on how to create a project, see: 🚀 Getting Started.
After this, navigate to the project overview page. This page includes important details about your project, such as your Project API key. Remember to copy this key and insert it into your .env file as PROJECT_API_KEY:
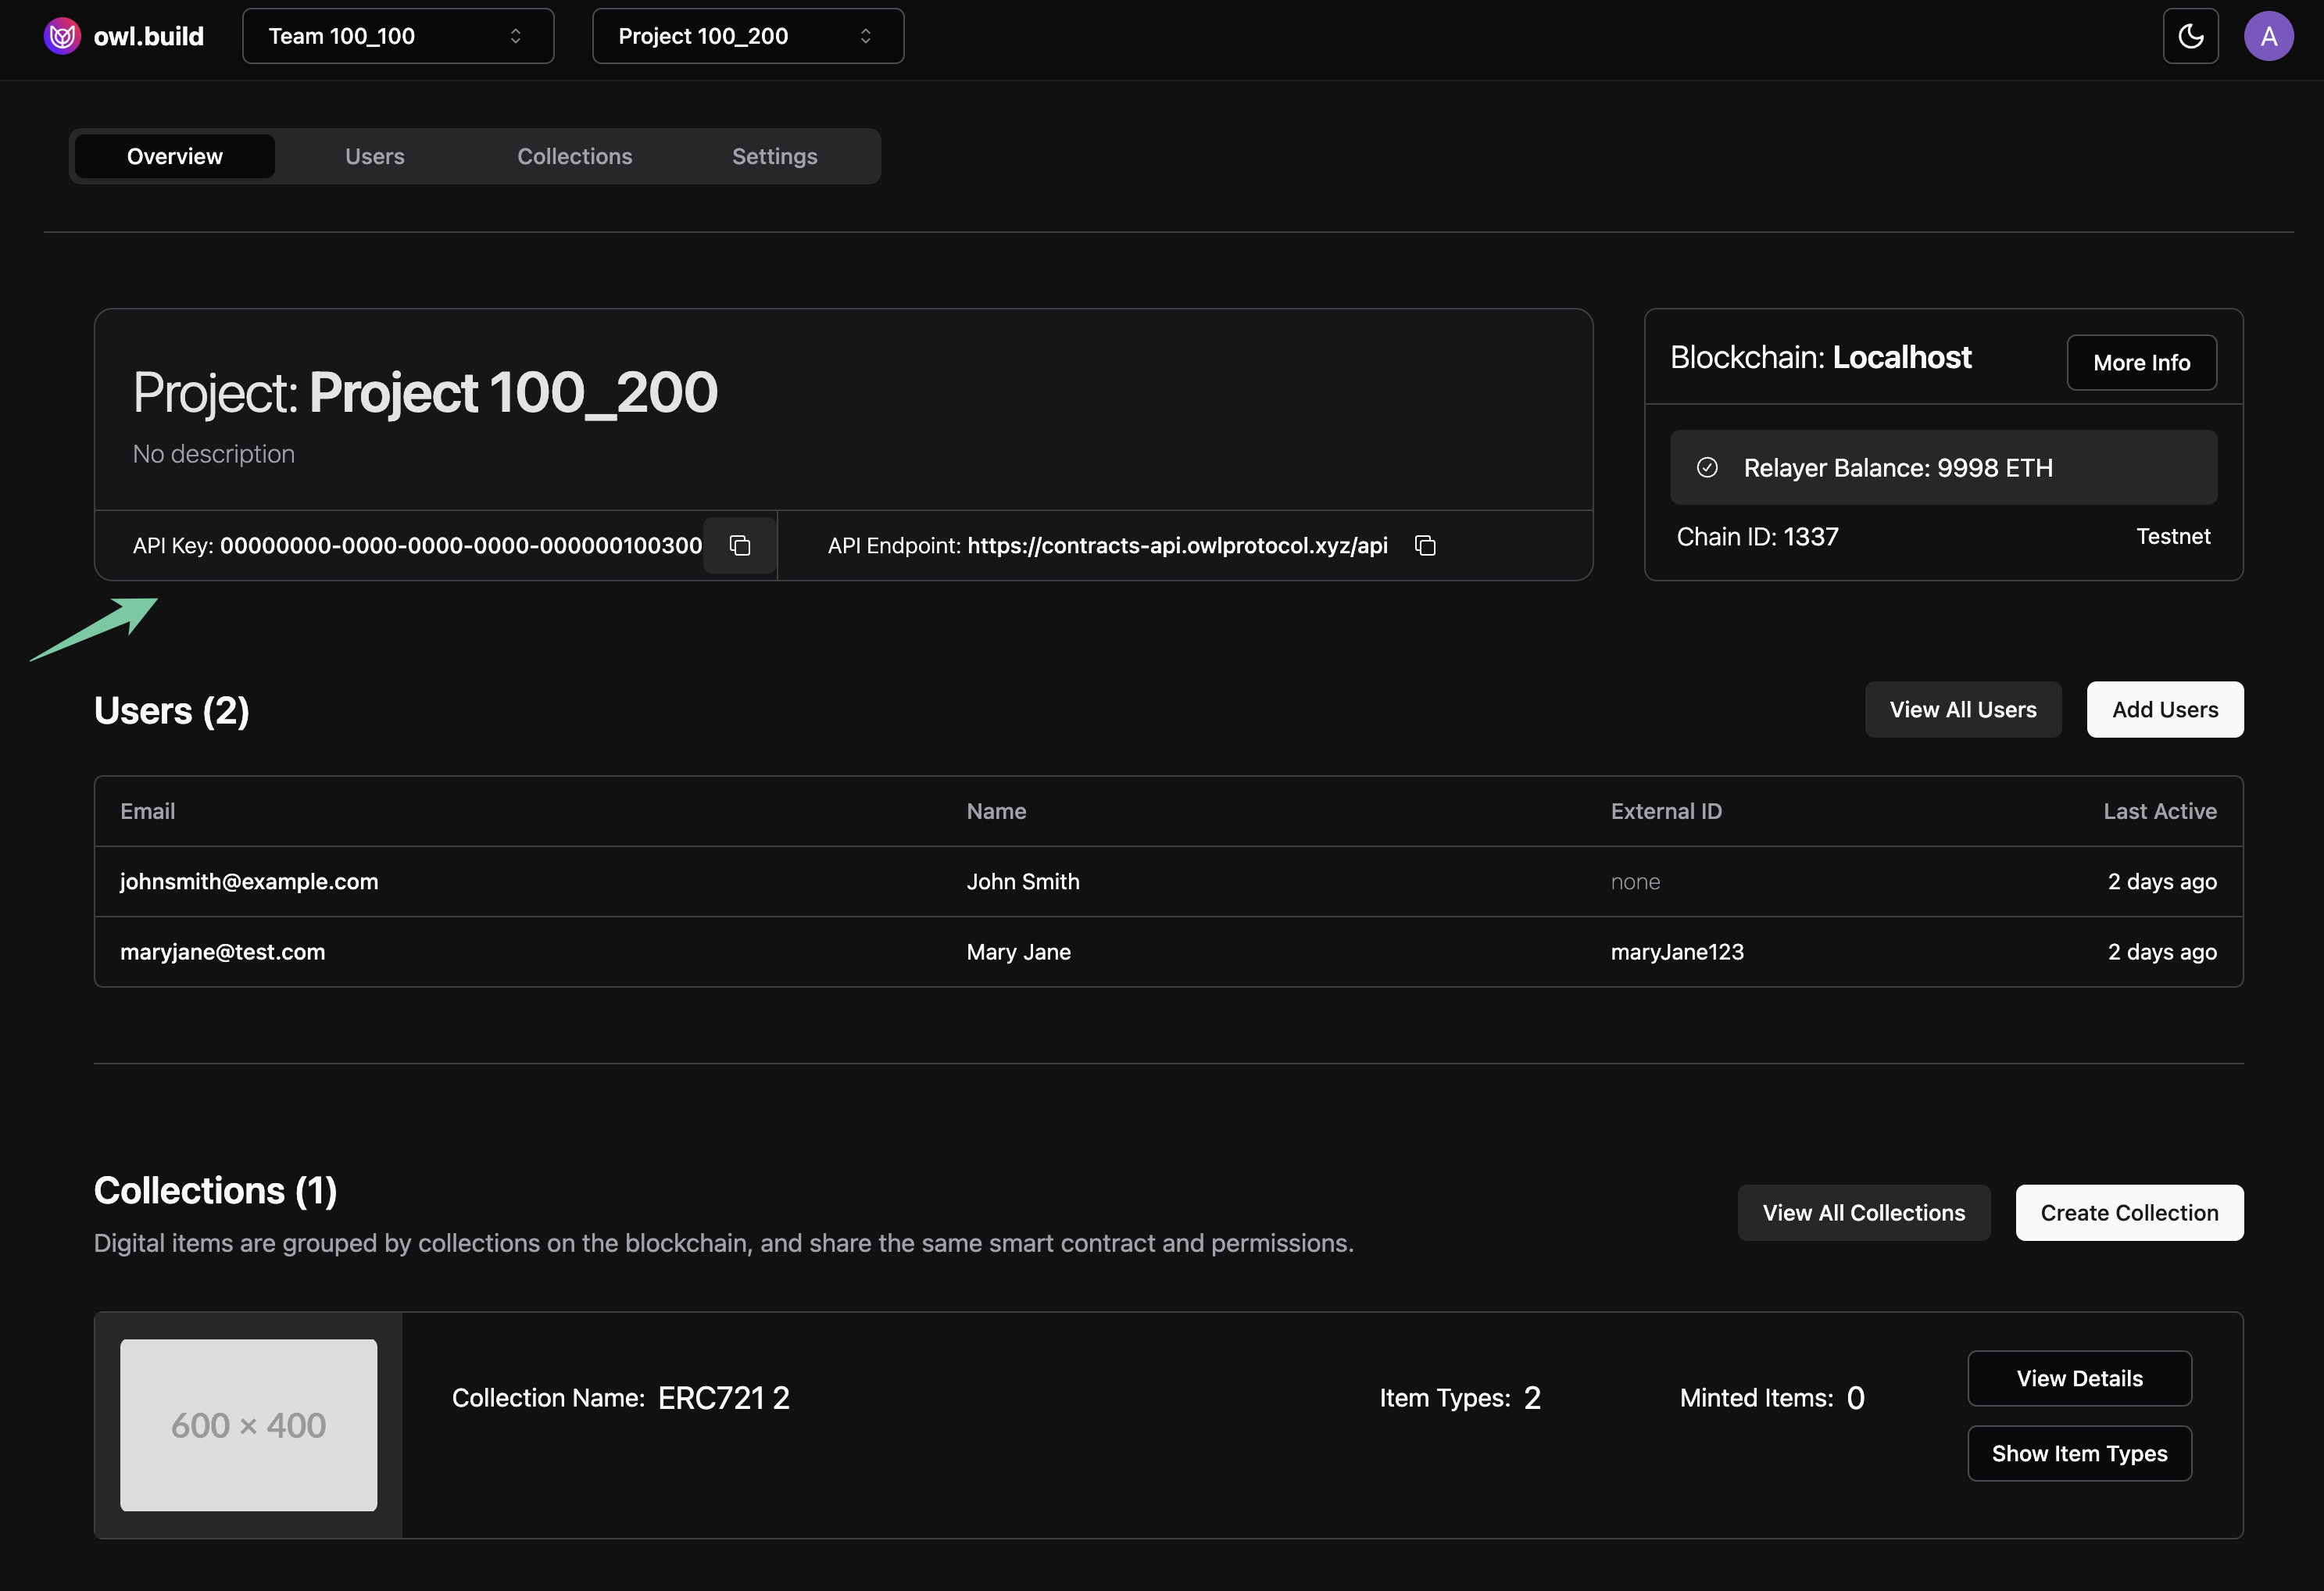
The project API key allows you to use the Owl Protocol API and create assets for your users. Follow these four steps:
- Initialize Owl Protocol client
- Add users to your project
- Create an ERC721 collection
- Mint assets to each user
Step 1: Initialize Owl Protocol client
First, initialize the Owl Protocol client and load your environment variables. This includes your PROJECT_API_KEY, which is necessary for interacting with the Owl Protocol API.
// Initialize Owl Protocol client
import { createClient } from "@owlprotocol/core-trpc";
import dotenv from "dotenv";

// Load environment variables
dotenv.config();

const { PROJECT_API_KEY } = process.env;
if (!PROJECT_API_KEY) {
    throw new Error("PROJECT_API_KEY not found! Ensure it's added to your environment.");
}

// Create client with API credentials
const client = createClient({ apiKey: PROJECT_API_KEY });
Step 2: Adding users to your project
To mint an asset for a user, you must first add the user to your project. This can be accomplished by using the createOrSet method:
const user = await client.projectUser.createOrSet({
		email: "[email protected]";
		// Optional fields below
		fullName: "John Doe",
		externalId: "0035e2c4-7e35-4c7b-8332-58e59e4272e2"
})
To retrieve the user by email, you can use get method:
const user = await client.projectUser.get({
  projectId: project.projectId,
  email: user.email,
  chainId: project.defaultChainId,
})
Step 3: Launch a collection
Deploy an ERC721 collection using the client. This represents unique assets. Set the name and symbol of your collection, and any other optional parameters
// Deploy ERC721 collection
const contract = await.client.collection.deploy.mutate({
		name: "My Collection",
		symbol: "MYC",
		// Add other optional parameters
})
// `contract` now contains data about the deployed ERC721 collection
Step 4: Mint assets to new users
Minting an asset
Finally, mint an asset to the user by calling collection.erc721AutoId.mint. The mint operation requires the colleciton address, recipient's address, and optionally asset metadata (like a name and description), and the image content in a base64 encoded string form. When adding an image content, you must also specify the image suffix (eg: png, jpg, jpeg).
let encodedImage: string; // This needs to be a base64 encoded image. Replace with your own encoded string

await client.collection.erc721AutoId.mint.mutate({
    address: contract.address,
    mints: [
        {
            to: user.address,
            // Metadata in OpenSea format
            metadata: { name: "My NFT", description: "My NFT description" },
            imageContent: encodedImage,
            imageSuffix: "png",
        },
    ],
});
Alternatively, if you have an image hosted online, you can directly pass the image URL to the metadata object:
const imageUrl = "https://example.com/image.png"; // Replace with your image URL

await client.collection.erc721AutoId.mint.mutate({
    address: contract.address,
    mints: [
        {
            to: user.address,
            metadata: { name: "My NFT", description: "My NFT description", image: imageUrl },
        },
    ],
});
This allows you to either upload an image directly or reference an existing online image.
Minting an asset by item type
You can also mint an item using your item types. To do this, locate the item type you want to mint from on your dashboard, and copy the Template Id.
 // Template id copied from dashboard
const projectTokenTemplateId = "bc831749-97ae-439d-91d2-9469e679726c";

await client.collection.erc721AutoId.templateMintBatch.mutate({
    address: contract.address,
    projectTokenTemplateId,

    to: [user.address], // `to` expects an array of addresses.
});
This function enables minting items using the metadata of your item types for one or more users simultaneously. This is especially helpful when you want to mint multiple items possessing identical metadata.
Updated about 16 hours ago